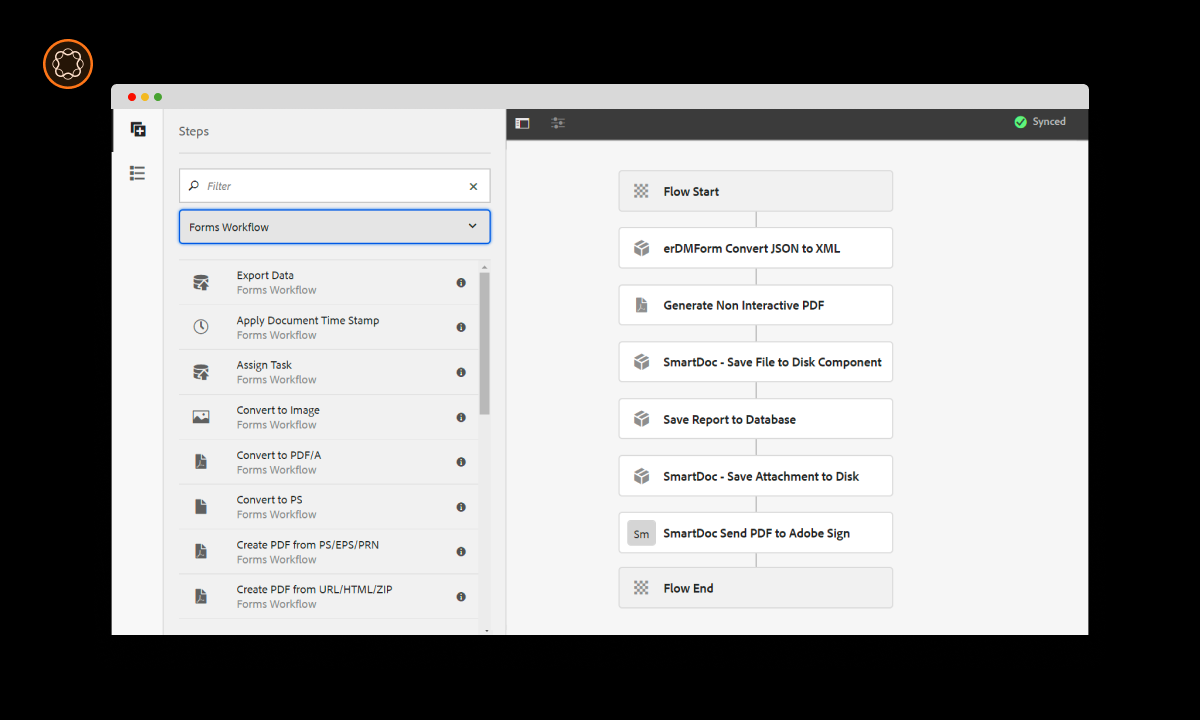
Adobe Experience Manager (AEM) is a comprehensive content management solution that empowers developers and content creators with numerous features to streamline their digital content processes. One such feature is the ability to create custom workflows. Workflows in AEM are a set series of steps that automate a process, such as publishing content, reviewing content, or any other multi-step process. This guide will walk you through how to create a custom workflow in AEM.
Key Takeaways
- AEM custom workflows facilitate automation of various multi-step processes.
- The process of creating a workflow involves creating a workflow model, defining steps, and activating the workflow.
- Understanding the process of creating custom workflows can enhance your AEM proficiency.
- Familiarity with common issues and their solutions can make the development process smoother.
Understanding Workflows in AEM
Workflows in AEM are essentially a series of steps that are followed to complete a process. Each step in a workflow can be an action, a decision, or a process. These steps can be arranged and customized to suit specific needs, enabling efficient and automated content management processes.
Accessing the Workflow Model Editor
- Open AEM: Access AEM through your browser.
- Navigate to Tools: From the AEM start page, go to “Tools” > “Workflow” > “Models”. This will open the Workflow Models page.
- Open Workflow Model Editor: Click on “Create”, then “Create Model”. This will open the Workflow Model Editor.
Creating a New Workflow Model
- Name Your Workflow Model: In the Workflow Model Editor, provide a Title and Name for your workflow model.
- Save Your Workflow Model: Click on “Done” to save your new workflow model.
Defining Workflow Steps
- Add a Step: In the Workflow Model Editor, drag and drop a step from the side panel into the workflow model.
- Configure the Step: Click on the step to open the step configuration. Here you can set various properties such as the step name, description, and handler.
- Connect Steps: Use the “Transitions” tab in the step configuration to define the next step that should be taken after the current one.
- Save Changes: Click on “Done” to save your changes.
Activating the Workflow
- Navigate to the Workflow Models Page: From the AEM start page, go to “Tools” > “Workflow” > “Models”.
- Activate Your Workflow Model: Find your workflow model in the list and click on “Activate”.
Testing the Custom Workflow
After creating and activating your custom workflow, it’s essential to test it to ensure it works as expected. This can be done by running the workflow on suitable content in AEM.
Best Practices for Custom Workflows
- Clear Naming: Use clear, descriptive names for your workflow models and steps.
- Purpose-Driven Design: Always design workflows with their purpose in mind to ensure they efficiently achieve their intended goal.
- Testing: Always thoroughly test a new workflow to ensure it works as expected.
Troubleshooting Common Issues
Creating custom workflows in AEM can sometimes present challenges. Here are a few common issues and their solutions:
| Issue | Solution |
|---|---|
| Workflow doesn’t trigger | Check the workflow model and step configurations to ensure they are correct. |
| Workflow step fails | Troubleshoot the failing step by checking its handler and other configurations. |
Conclusion
Creating a custom workflow in AEM allows for greater automation and efficiency in managing digital content. By understanding workflows, accessing the Workflow Model Editor, creating a new workflow model, defining steps, and activating the workflow, you can create a custom workflow tailored to your specific needs. As always, remember to follow best practices and troubleshoot any issues for a successful workflow creation process.

I’m Kirill Efimov, an experienced AEM developer with over 10 years of experience in Java and web development. I’m skilled in developing AEM components, templates, workflows, and integrations with other systems, and I’m passionate about delivering high-quality solutions to my clients.
I also believe in knowledge-sharing and staying up-to-date with the latest developments in the industry. Through blog posts, tutorials, and speaking engagements, I’m committed to contributing to the AEM community and helping others overcome the challenges they may face in their AEM projects.
